DIY Chicken Feeders
One of the holy grails of keeping chickens is being able to feed them entirely from feed produced on-farm. We’re making some progress that way since our days of urban homesteading in the sandy flats of Coastal GA. Our beloved Jersey, Bumblebee, and experimenting with home cheese production (pro-tip: learning the ropes of cheese making will keep many chickens and possibly a pig or two in slops with failed cheeses) brought us even closer. However, we still do have to buy feed for the girls to supplement our sporadic chicken consumable kitchen waste. No one likes to see the chicken feed scratched all over the coop or run and not eaten! So, we have experimented with a couple designs over the years that keep the food in the feeder and yet are simple to assemble and can hold a few days worth of feed for the flock.
DIY Chicken Feeder (Vertical)
My old standby that I have several of and have used for years are these:
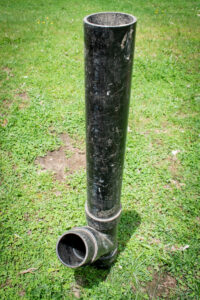
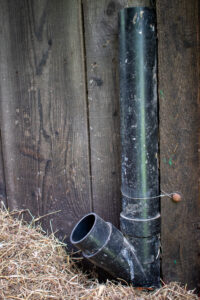
They’re constructed of 3″ PVC with a Y junction and a vertical section to hold the feed. There is a stub of PVC in the bottom of the V (3-4 inches) just to raise the feeder outlet up to a comfortable height for most chickens. Super cheap, super easy and really effective.
I’ve mostly built walk-in style coops in fixed locations and there was plenty of head room for these guys to stand in the coop where they would stay dry and there was still room to fill them from above with comfort. However, when we decided to add a more mobile coop to our coop suite (click here for some tips on DIY coop design we have picked up over many coop builds!), this design proved too tall to fit in our chicken ark style plans and I needed to regroup on the feeder front. I stumbled across this box-style feeder which looked pretty easy and applied the same principle of PVC scratch-proofing to the lower profile design.
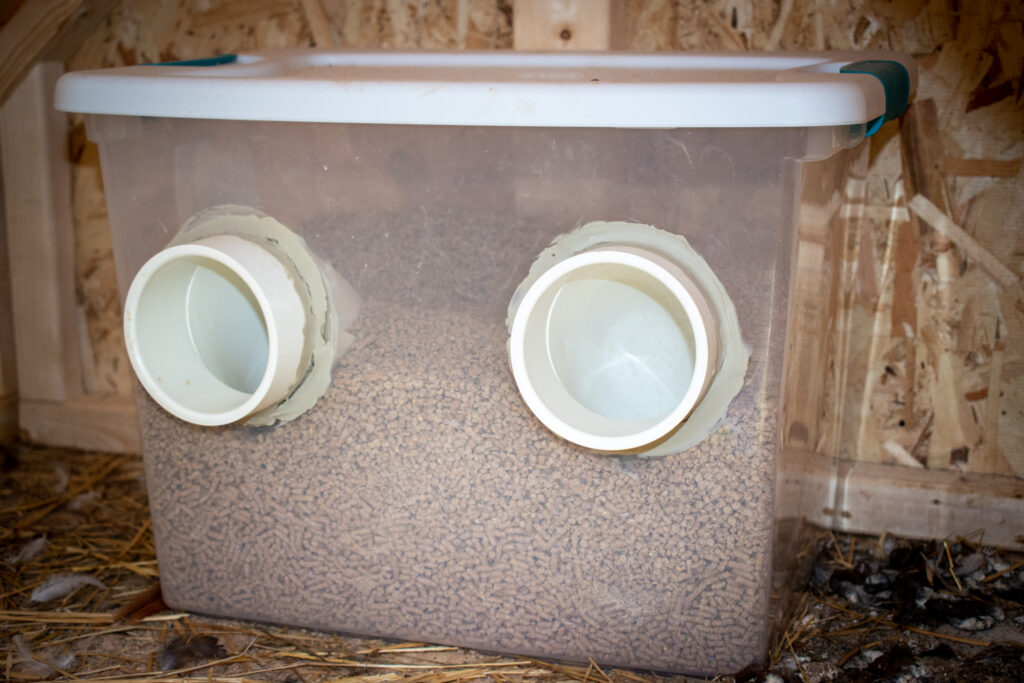
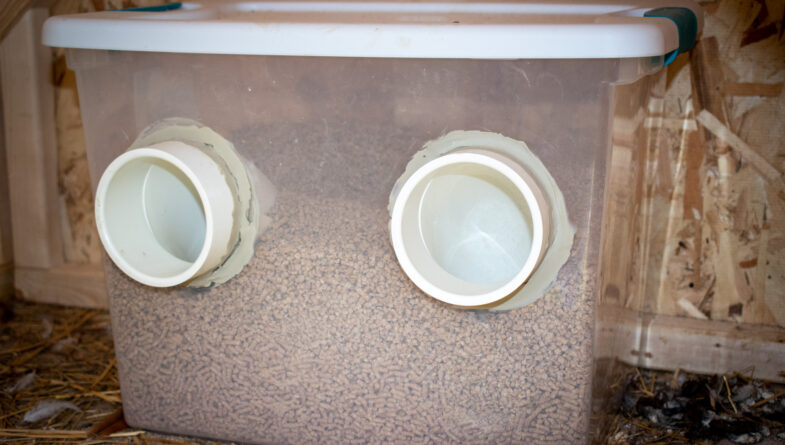
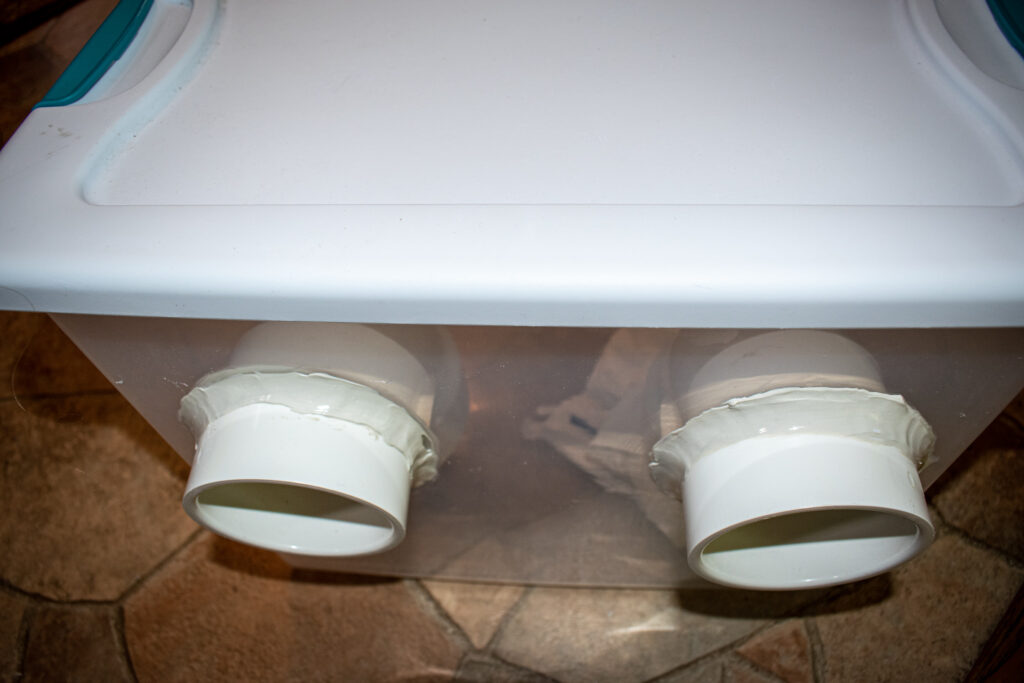
DIY Chicken Feeder (Box Style)
There is a lot of simple customization here regarding how big of a bin to utilize, how many feeders to insert, etc. depending on your application and needs. One opening should normally service 4-5 chickens. I’ve only ever had two of my old-style stand-up feeders and have had as many as 30 girls sharing them without too much trouble…
I would suggest going with a transparent tote, though, to make a quick visual of feed levels remaining without having to pull the lid. The materials list to complete this build is below along with instructions for assembling this unit.
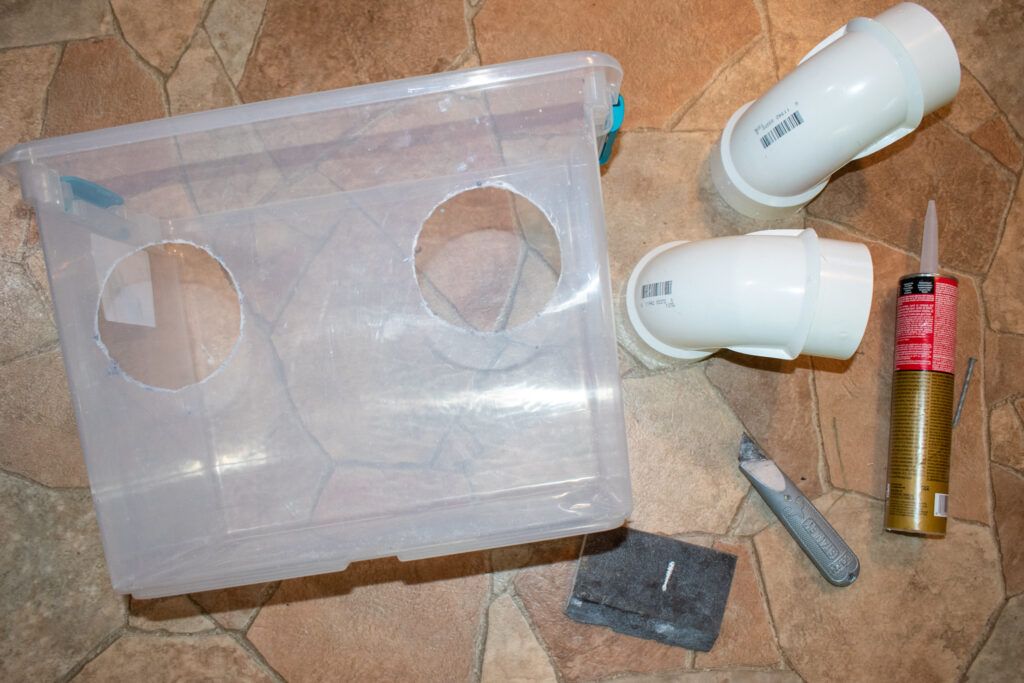
Materials List
- 90 degree PVC elbow, 3″ (as many as you plan to install, 2 in our build)
- A suitable tote with a tight lid, wide enough to hold your feeders
- liquid nails or caulk of some kind to fix the PVC into the tote
- 3.5″ hole saw (or a Dremel and a steady hand)
Assembly Instructions
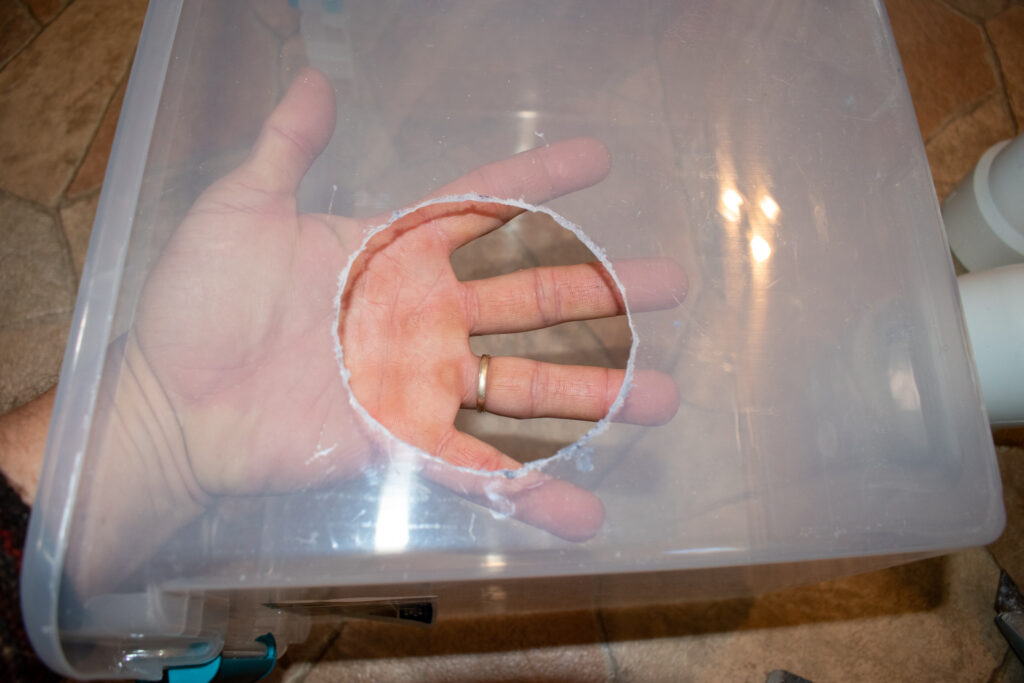
Step 1: Measure and mark the holes you will cut to insert the angled PVC. You’ll want to mount them at a height where the bottom of the bend is an inch or two above the bottom of the tote and space them at a comfortable chicken width (about 8-12 inches). I placed the elbows inside the box at the appropriate height and traced a circle with marker on the outside of the tote.
Step 2: If you have a hole-saw appropriately sized, drill carefully so as not to crack the plastic tote. Running the drill lightly against the plastic for a few moments to warm and soften it might help to prevent cracking. I didn’t have the right size hole saw but was able to make a Dremel tool work fine to cut out my circle.
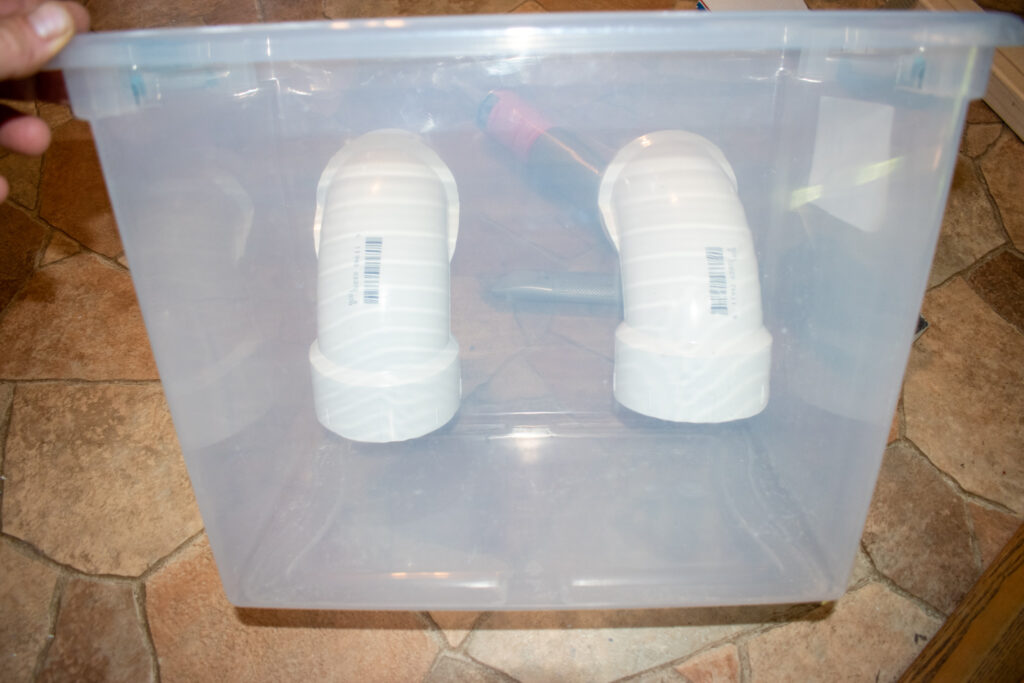
Step 3: Insert your PVC into the box for a fit check. Again, you want the bottom of the tote about an inch or two below the feeders so the feed will continue to fall under them where the chickens can peck it up as they empty the tote.
Step 4: Apply a generous bead of Liquid Nails around the portion of your PVC piece and insert it into the hole in the tote. You may need to support the feeder slot from the inside of the tote while the liquid nail sets up.
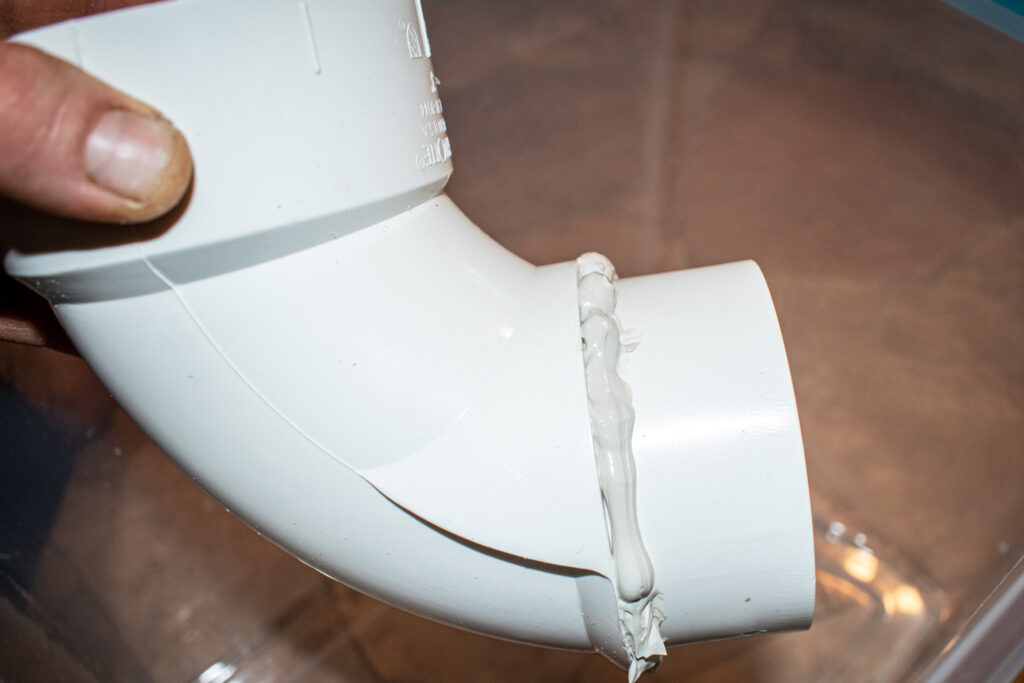
Step 5: Apply another bead around the outside of the tote opening and smooth it with a damp finger.
Step 6: When the caulk is thoroughly dry, fill with feed and show your chickens where the feed is! Easy-peesy and no more wasted feed!
Check out our design for a DIY chicken waterer as well, which mounts to the outside of the coop or run and requires no cleaning and wastes no water! Keep on clucking!