7 Chicken Coop Design Tips
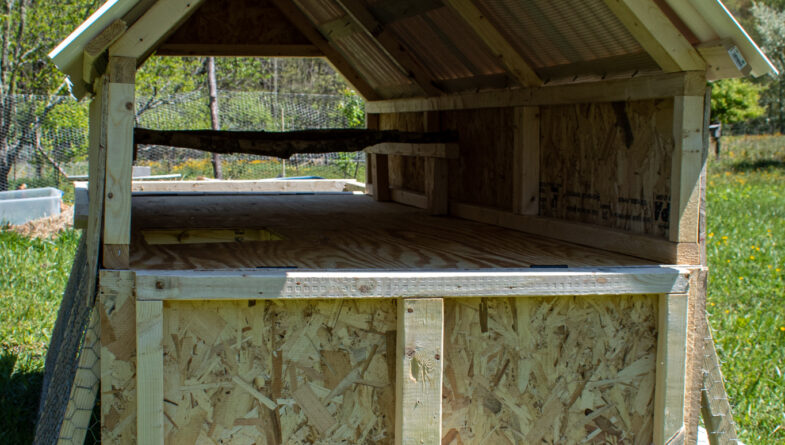
Thinking about chickens? Here are my top seven coop design tips that will keep the biddies safe, the costs down, and your stamina high!
7. Build Predator Proof
A coop that is small and tight beats a coop that is big and difficult to secure. The chickens are normally in the coop only at night and during really bad weather. After dark they become completely defenseless chicken nuggets waiting to be eaten. Even in a suburban setting, predators like raccoons or possums will eventually find them and can do a lot of damage to your flock in one night. If you can go big with the run, great, but make sure the coop is tight! Use hardware cloth to cover all openings and ensure the coop is securely closed every evening. Plan on allowing at least 2 square feet per chicken in the coop, though my temporary coop is only 2’x3′ and usually houses 10 chickens or so at a time. In a pinch, they just need a secure box to perch in at night.
6. Go Mobile or Semi-mobile
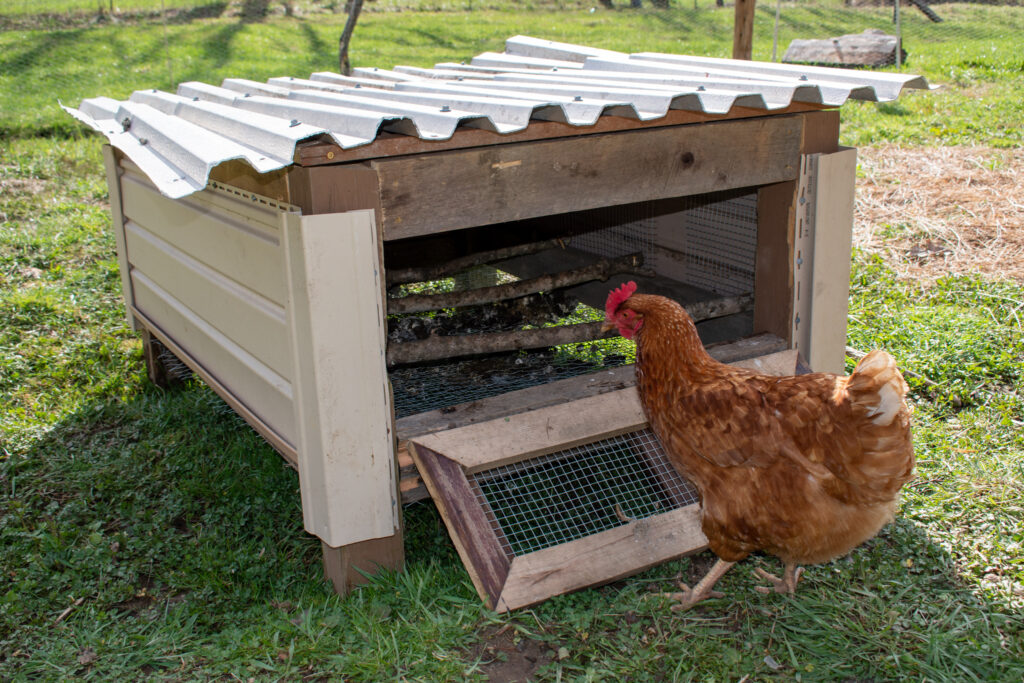
If you’re planning on doing chickens for the long-haul plan on a coop that can be moved. Like all animals, chickens are subject to many kinds of parasites and while you can medicate them, this is both expensive, has questionable health effects for your family as well as the birds, and it may lead in the long-run to resistant parasite populations. On our farm we have three coops currently. A fixed one in the largest fenced area, a somewhat mobile one with its own small run attached, and a tiny temporary use one for short term relocation. You might consider establishing some kind of rotational system that allows the chickens to take a year off from their daily haunts to break some of those parasite life cycles.
A chicken tractor or mobile coop also allows using the chicken’s tilling and de-bugging powers over garden beds between crops without having to free-range the chickens. It also means that you can keep the girls on grass rather than mud and dirt. This is more fun for the chickens, healthier for your yard, and means less poop and mud on your eggs.
My good looking young assistant demos the mobile coop we recently constructed at the Epicurean Homestead. Plans coming soon!
5. Install an Automatic Chicken Door
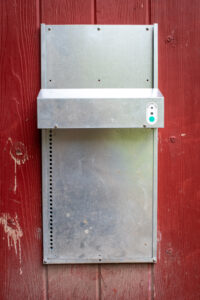
Building a secure coop is useless if the chicken door is left open at night. Closing the coop door every evening and opening it early every morning is an easy but relentless chore. If you travel for a day or two the food and water can easily be set up to last but someone still needs to secure the coop at night and release the chickens in the mornings. An automatic door removes this from the chore list by closing itself at night and opening itself in the morning. I love my Ador1 automatic chicken door (not an affiliate, just a good functional product). It’s my single favorite chicken splurge and will be yours too when you install one. You can run them on battery or install a solar panel power kit.
4. Keep it Airy
Good ventilation is important for chicken health. You don’t want gusty drafts in the winter if you get a lot of cold weather but it’s more important that you provide plenty of opportunity for the air to circulate. Overly tight and insulated coops trap moist air in the winter and heat in the summer which are both breeding grounds for chicken illness.
Using plastic or metal sheet roofing provides easy natural air flow out the top of the coop. Make sure you provide predator protection under the roofing if needed, such as installing the roofing over hardware cloth. Rats and weasels can easily squeeze in the openings under the eaves!
4. DIY Feeder
For a couple bucks in PVC parts you can build a feeder and water that are almost entirely waste free and so much easier to customize for your coop plans to keep long term maintenance and chicken care at a minimum. Here are a couple of designs for simple, DIY chicken feeders. Click here for DIY Chicken Feeder plans!
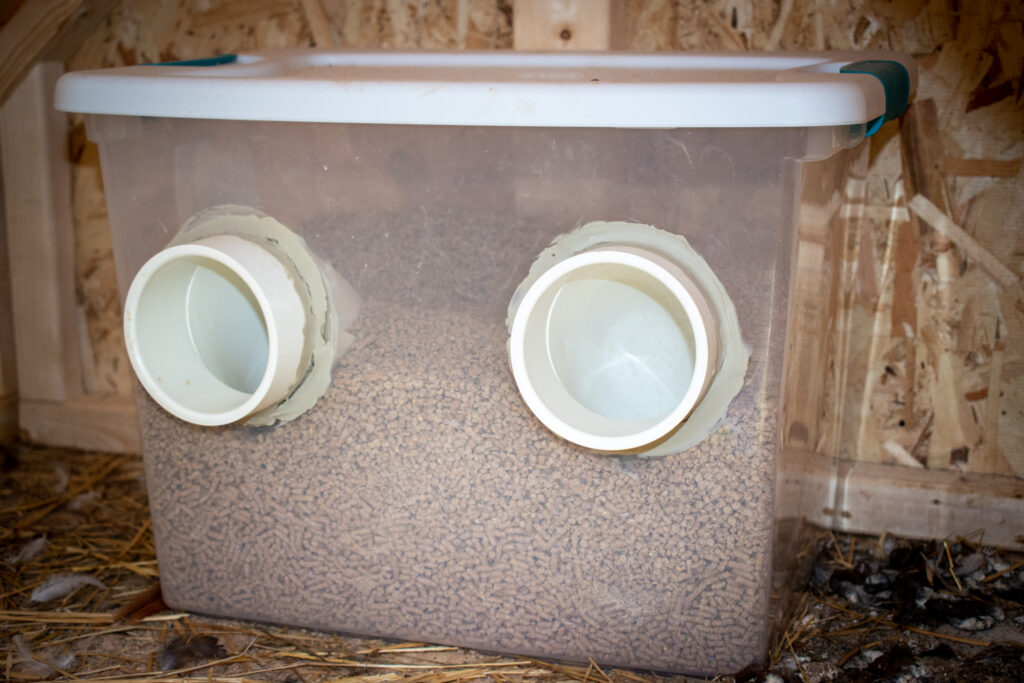
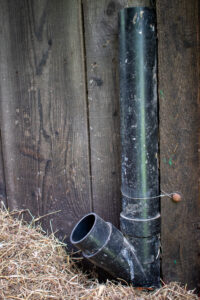
They’ll hold several days worth of food and keep waste near zero. Put the food inside the coop or some other weather-sheltered area. This allows the girls to feed comfortably in bad weather and increases the consumption of any food that does spill as it isn’t likely to get wet in the coop.
3. DIY Waterer
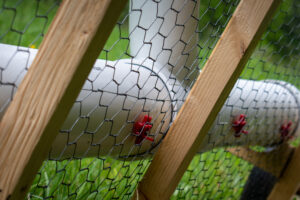
Chickens love to scratch. They’ll fling dust, dirt, leaves, and poo into everything in and around the coop and run. Waterers then need be cleaned even if they hold enough water for two weeks. The advent of the side-mount nipple waterer changes this. I first used nipples years ago when they made them to be installed on the bottom of a bucket. These were efficient and kept the water clean but it is difficult to fill and handle a bucket when you can’t set it down on the nipples on the bottom of the bucket. They also had to be hung somewhere high enough for the chicken to stand under them, which wasn’t always convenient. The side mount nipple changes this and offers so much flexibility in building durable, efficient waterers. Click here for DIY plans for this chicken waterer.
2. Cleaning Considerations
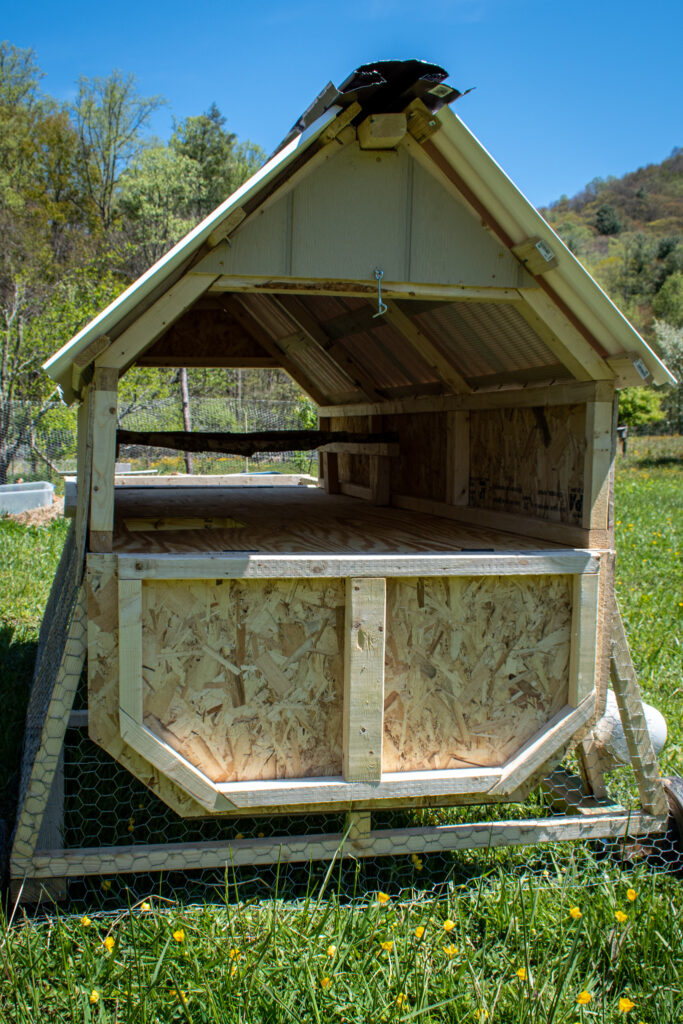
You want easy access to every area of the coop and a comfortable working angle for cleaning inside the coop. The majority of the mess will be under the perches as the chickens spend most of their coop time perched at night. Easy access will ensure the chore gets done often enough to not become a health hazard for the chickens. I like to build a semi-removable rack for roosts to make periodic deep cleaning (or roost replacement) easier. I’ve seen other people who put a sloped tarp under the roosts to roll poo into an even smaller area, though I’ve never tried that.
1. Outside Accessible Nests
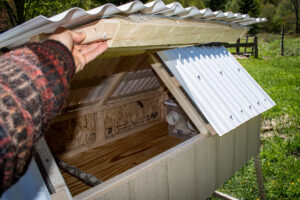
You only need one per 3-4 birds. Even if you offer more than that they’ll likely only use the same one or two anyway! Having the nest boxes accessible without going into the coop or run makes collecting the eggs easy, quick, and clean! Your kitchen counter and the consumer of your eggs will thank you!
I hope this has given you some ideas to incorporate in your next chicken coop! Click hear for 10 Chicken Newbie Mistakes to avoid!
